We’ve all been there – you step out of the shower with freshly washed hair, ready to style it for the day, but no matter how hard you try, it just doesn’t look as sleek and shiny as the hair you see on your favorite influencers or in salon ads. If your hair has been looking lackluster after blow-drying, you’re not alone. The key to achieving salon-quality results with a hairdryer lies not only in technique but also in choosing the right tools and products.
In this guide, we’ll walk you through the step-by-step process of drying your hair properly with a hairdryer, providing expert tips, temperature settings, and the best protective products to ensure your hair looks professional, healthy, and shiny.
Step 1: Start with Clean, Damp Hair
Before you even think about turning on the blow dryer, the first step in achieving salon-worthy hair is to start with clean, damp hair. Here’s why:
- Clean hair allows styling products to work more effectively and gives you a fresh base to work with.
- Damp hair (not soaking wet) dries faster, reducing heat damage and helping the blow-dry last longer.
How to Prepare Your Hair:
- Shampoo and Condition: Choose a shampoo and conditioner that suit your hair type. For example, if you have fine hair, opt for a volumizing shampoo, and if your hair is dry or damaged, use a moisturizing formula.
- Towel Dry: Gently towel-dry your hair to remove excess moisture. Don’t rub your hair vigorously with the towel as this can cause frizz and breakage.
- Detangle: Use a wide-tooth comb or a detangling brush to remove any knots and tangles. Starting at the tips and working your way up is ideal to avoid breaking hair strands.
Step 2: Apply the Right Heat Protectant
One of the most crucial steps in blow-drying your hair is using a heat protectant. High heat from blow-dryers can cause significant damage to your hair, leading to dryness, split ends, and color fading. A good heat protectant acts as a barrier and keeps your hair healthy.
Why Use a Heat Protectant?
- Prevents Damage: Heat protectants form a shield around the hair shaft, which minimizes the effect of high temperatures.
- Adds Shine and Smoothness: Many heat protectants contain silicone-based ingredients that smooth the hair cuticle, leaving hair shiny and frizz-free.
- Improves Hair Health: Some heat protectants are infused with nourishing ingredients like vitamins, keratin, or oils, which strengthen the hair and help prevent breakage.
How to Choose a Heat Protectant:
- For Fine Hair: Choose a lightweight, spray-type heat protectant that won’t weigh your hair down.
- For Thick or Curly Hair: Go for a creamy or serum-based protectant that adds moisture and reduces frizz.
- For Color-Treated Hair: Look for a heat protectant with added UV protection and anti-fading properties to preserve your color.
How to Apply Heat Protectant:
- Spray or apply the protectant evenly throughout your damp hair, focusing on the mid-lengths and ends.
- Comb through to ensure an even distribution.
Step 3: Choose the Right Blow Dryer
The blow-dryer you choose can significantly impact the quality of your blowout. Here’s what to look for:
Key Features of a Good Blow Dryer:
- Ion Technology: Ion dryers release negative ions, which help reduce frizz and static, leaving hair smoother and shinier.
- Ceramic or Tourmaline Coating: These materials ensure even heat distribution and minimize heat damage.
- Adjustable Heat and Speed Settings: A blow dryer with multiple heat and speed settings gives you control, allowing you to tailor the drying process to your hair type.
- Cool Shot Button: This feature is essential for setting your style in place and adding shine after the hair is dried.
Blow Dryer Tips:
- Use a dryer with at least 1800 watts for faster drying.
- Consider your hair type: For fine or damaged hair, use a dryer with lower heat settings. For thick, coarse hair, you may need a higher heat setting for faster drying.
Step 4: Blow Dry in Sections
Blow-drying hair in sections is key to achieving a smooth, polished look. By dividing your hair into smaller parts, you ensure even drying and help avoid unnecessary frizz.
How to Section Your Hair:
- Divide your hair into 4-6 sections using clips (the exact number depends on how thick your hair is).
- Start with the bottom sections: This allows you to work through the thicker layers first and ensures you don’t miss any spots.
- Clip the top sections out of the way while you focus on the bottom half.
- Work your way up, finishing with the crown and top sections of your hair.
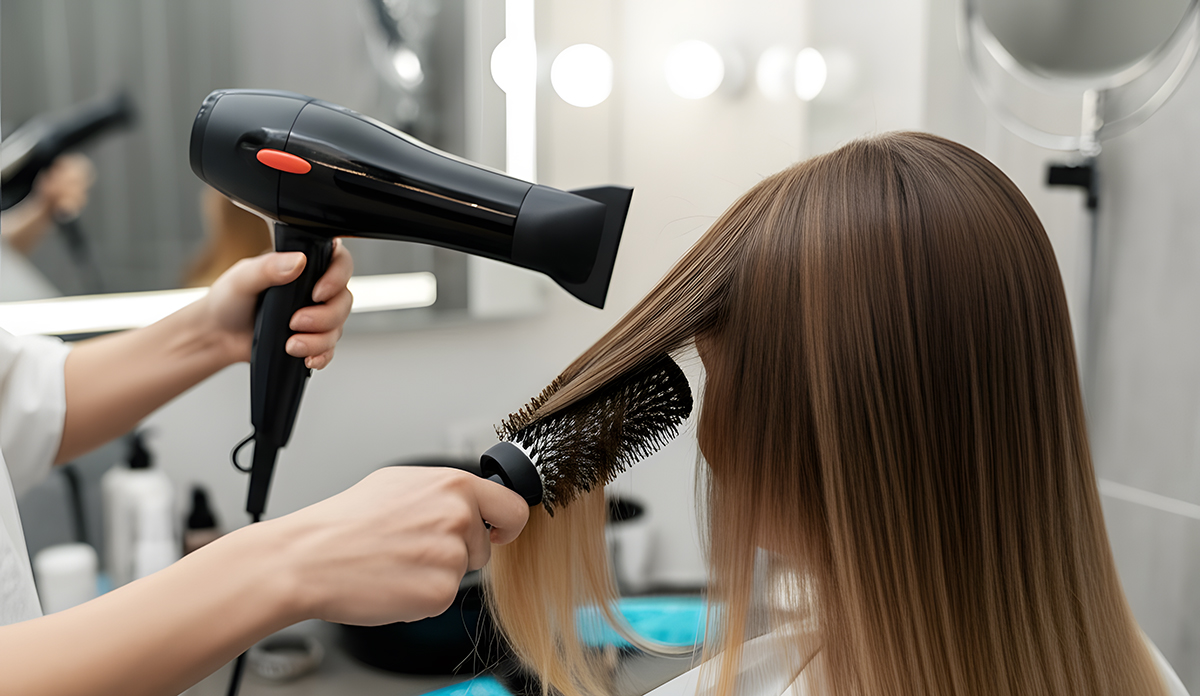
Step 5: Choose the Right Blow-Dry Technique
Now that your hair is prepped and sectioned, it’s time to blow-dry. The technique you use will depend on the look you want to achieve.
For a Smooth, Sleek Blowout:
- Use a round brush: A vented round brush is ideal for creating a smooth and voluminous blowout. The holes in the brush allow air to circulate, speeding up the drying process.
- Work with the dryer at a downward angle: Always point the blow dryer downward toward the hair shaft to help smooth the cuticle and avoid frizz.
- Keep the dryer moving: Don’t hold the blow dryer too close to your hair. Keep it at least 6 inches away from your scalp to prevent damage and avoid overheating your strands.
- Dry each section thoroughly: Move the dryer slowly from root to tip, following the brush as you go.
For Volume and Body:
- Flip your hair upside down: Drying your hair upside down helps create volume at the roots.
- Use a round brush for lift: When drying the top sections, wrap the hair around the round brush and pull upward, gently lifting at the roots.
- Use a lower heat setting: This will help prevent hair from becoming flat or weighed down.
For Loose Waves:
- Use a large barrel round brush: This will help add soft curves and movement to your hair.
- Twist the brush slightly as you dry: This technique adds a natural wave to the hair, giving it a relaxed, beachy look.
- Use the cool shot button: After styling each section, hold the cool shot button to set the waves and lock in volume.
Step 6: Finish with the Cool Shot and Styling Products
Once your hair is fully dry and styled to your liking, it’s time to lock in the look and add the finishing touches.
How to Use the Cool Shot:
- Press the cool shot button on your blow dryer. The cool air helps seal the hair cuticle, locking in shine and setting the style in place.
- Focus on your roots to add extra volume and keep your hair in place.
Styling Products:
- Serums: Apply a lightweight shining serum to the ends of your hair to add a glossy finish and tame any flyaways.
- Hairspray: A light mist of flexible-hold hairspray can help keep your hair in place without making it stiff or crunchy.
- Texturizing Sprays: For extra volume and texture, use a texturizing spray on the roots or mid-lengths to create a tousled, full-bodied effect.
Additional Life Hacks for Salon-Worthy Hair
- Use a microfiber towel: To minimize frizz and breakage, dry your hair with a microfiber towel instead of a regular bath towel. This helps absorb moisture without roughing up the hair cuticle.
- Blow-dry in sections: If your hair is especially thick or long, break it into smaller sections for more even drying and to ensure the heat is distributed properly.
- Choose the right brush: Boar bristle brushes help smooth hair and distribute natural oils from the scalp, giving your hair a healthier, shinier appearance.
- Don’t over-dry: Over-drying can make hair look limp and lifeless. It’s okay to leave your hair a little damp, especially if you’re going for a beachy, undone look.
- Maintain your blow dryer: Clean the filter of your blow dryer regularly to prevent dust and buildup from affecting its performance.
Conclusion
Blow-drying your hair properly is an art that requires the right tools, products, and techniques. By following these simple steps, you can achieve salon-quality results without leaving your home. From using the right heat protectant and blow-dryer to mastering drying techniques, each step plays a vital role in how your hair turns out.
Remember, the key to a perfect blowout is patience. Don’t rush through the process – take your time to section your hair, use the correct technique, and finish with the right styling products. With practice, you’ll be able to create smooth, shiny, voluminous hair that looks like it just came from a salon every time you pick up your blow dryer.
Are you ready to give your blow-drying routine a salon-level upgrade? Let us know your tips and experiences in the comments below!